Screen Printing Process Explained
Screen Printing Process Explained
How Does Screen Printing for Custom Merch Work?
What exactly is screen printing anyway? Most of us can identify a screen printed T-shirt when we see it, but few of us know how that design actually got there. At its core, screen printing is essentially a stenciling technique used to apply screen printing ink to a surface through a mesh screen.
So, here’s how it works: a stencil containing your design is placed on a mesh screen stretched across a frame and your product is placed under the screen. Then screen printing ink is spread across the screen with a squeegee, either manually or by a machine. Still don’t get it? No worries, let’s break it down further.
How does Screen Printing Work?
There are a couple different methods of screen printing, but the most popular one – and the easiest one to do at home – is silk screen printing. Silk screen printing may seem like a daunting task, but it’s simpler than you might think. Take a look at our 10 step guide to silk screen printing from the screen printing experts at Merchology.

Custom Screen Printing in 10 Steps
- Acquire Necessary Supplies – we’ve got a complete list for you below!
- Create your design – you’ll want a solid image with few thin lines because it will need to block light.
- Print your design – print your image on a transparent film using an inkjet printer.
- Coat your screen – cover your screen in a photosensitive emulsion. You want a thin, evenly spread layer of emulsion.
- Burn your screen – place the transparent film with your image on the screen where the emulsion is and place it in an exposure unit. If you’re doing this yourself use a 250 watt light bulb for about 10 to 15 minutes.
- Rinse out your image – spray down your screen with cold water. You should notice the section of the screen with your image on it is starting to flake off, keep spraying until you can clearly see your image. Once your image is clear let the screen dry.
- Tape up your screen – use masking tape to go around the inside of the screen to prevent ink from running into edges of the screen and spot check for any emulsion that was missed.
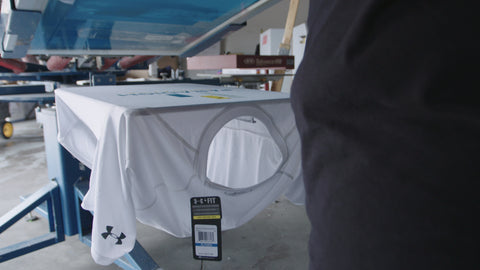
- Set up your screen – connect your screen to the press and line it up with your substrates then screw it into place.
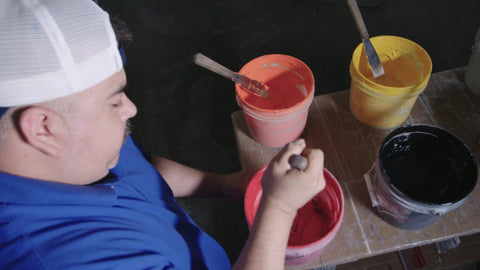
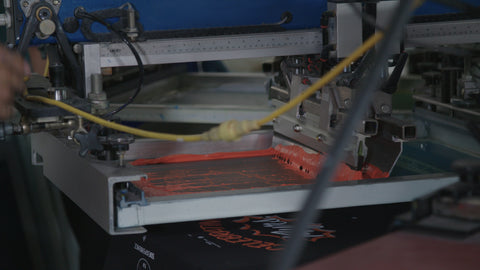
- Print your screen – pick your screen printing ink color and spread it across the top of your screen with your squeegee in smooth up and down movements. For commercial screen printing this is typically done by a machine.
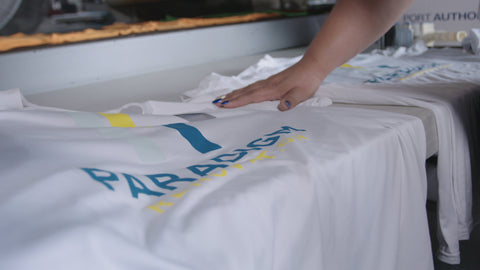
- Cure your ink – carefully remove your product from the platen and set to dry or heat cure. If you’re using plastisol ink it will take about 30 seconds at around 320 degrees Fahrenheit, but follow the instructions provided on your screen printing ink bottles. Once dry your custom printed shirts are ready to be worn!
What Equipment and Supplies Do You Need for Screen Printing?
Are you thinking about starting your own t-shirt printing business? Or maybe you are just curious how it all works before you order your custom screen printed apparel. Either way, the first step in the process is determining what supplies and equipment you’ll need before you get started. We can really break down your shopping list into two categories: pre-press equipment and screen printing equipment.
Pre-Press Equipment
Think of this as your screen printing starter pack – all the gear you need to create your stencils and screens that you'll use for printing.
- Computer – you’ll need a computer with graphic design software to create graphics for your stencils.
- Printer, Ink & Film – once you’ve designed your graphic you will need to print them onto a clear film. Make sure you have an Inkjet printer with Inkjet film, this is necessary to make film positives.
- Screen Printing Screens – you will need screens in various sizes and mesh counts. The 2 most common sizes used for screen printing are 20x24 inches OD (outside dimension) and 23x31 inches OD. Mesh count is determined by how many threads of mesh are crossing per square inch. The higher the mesh count, the finer the threads and holes are in the screen. The most standard mesh sizes are 110 & 156.
- Emulsion & Drying Racks – emulsion is a chemical that is used to make the stencil. Emulsion is a photosensitive liquid that is applied to the screen mesh. Different types of emulsions have different exposure ranges and exposure times. You will need to place the screens horizontally on drying racks while the emulsion is drying.
- Exposure Unit/ Light Table – once your emulsion is dried on the screens they are placed in a special exposure unit where UV light is shined on your emulsion coated screen to cure the emulsion. This is where the term “burning screens” comes from!
- Washout Station – this equipment is used to wash out the uncured emulsion from the stenciled area of the screen with water and to clean screens after press runs. If you're doing this at home, you can use a garden hose or pressure washer.
Screen Printing Equipment
This is the fun part, the printing itself. Here’s what you’ll do before you start laying down your first prints.
- Screen Press – this might go without saying, but the press itself is an integral part of the screen printing process. Screen presses can be either manual or automatic and come in varied color counts typically between 1 and 6.
- Screen Printing Ink – discharge inks can be either water-based or traditional plastisol. If you plan on mixing ink to make your own colors you’ll want to pick up a basic screen printing ink mixing kit along with screen printing ink containers and scoops. Check out or screen printing color options here.
- Squeegees – think of these as your paint brushes. In screen printing, squeegees are used to pull the ink across your screen and lay down the paint. Screen printing squeegees come in a few different durometers (a metric used for hardness) based on the screen printing ink type and mesh count of the screen.
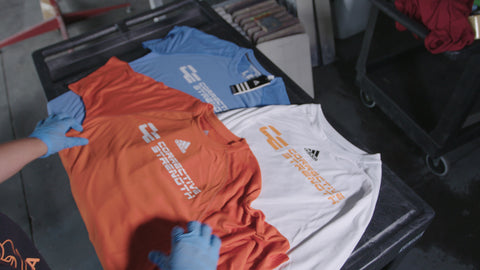
- Substrates – this is the actual item you’re printing on. The canvas for your masterpiece. This could be a shirt, sweatshirt, bag or anything else as long as it's on a flat surface.
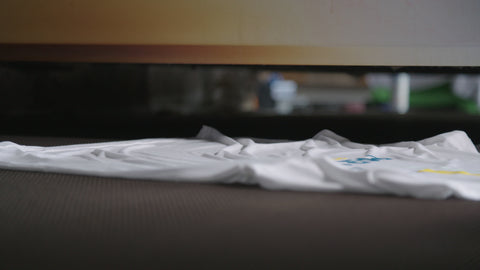
- Conveyor Dryer/ Belt Dryer – once your prints are pressed, the conveyor dryer will heat your ink to curing temperature to make your print last. Plastisol screen printing ink must reach a screen printing temperature of 300 – 330º F for curing, while water-based inks require 320 - 375º F.
- Flash Care Unit – a flash care unit is more of a “nice to have” than a “must have”, but it makes printing white underbases or overlapping colors much easier by partially curing your screen printing inks so you can add these additional layers.
Do Screen-Printed Tees Last?
When cared for properly, screen print decoration should last as long as your T-shirt does. Screen printing causes the ink to sink deeply into the fabric, it's not just adhered on top. At the least, screen print decoration lasts for 50 washes, but proper care increases your print's longevity.
Contact Us
You're now armed with the knowledge of the screen printing process! Now, be sure to check out our screen printing capabilities to see how we can help you generate awareness for your business with custom screen printed apparel and gifts. Check out our complete Custom Decoration Methods Guide to find the perfect decoration type for any application.